
Quickbooks Pro — Learn How to Leverage Your Data With ODBC
Why Would I Need Another Resource To Analyze My QuickBooks Data?
At Profitwyse, our goal is to guide midsize business owners toward decisions that improve profitability, cash flow and eventually enterprise value. Our client base consists primarily of distributors and manufacturers, though we do have some professional service clients. Nearly all of our new clients utilize QuickBooks for basic accounting, banking, payroll, some limited inventory management, financial reporting and compliance with federal and state taxing authorities. Though QuickBooks is an excellent tool for these tasks, there is much more value to be gained by business owners when they unlock the value of transactional data. One way to better access QuickBooks data is through an ODBC connection, which is the subject of this post.
What is ODBC?
Open Database Connectivity (ODBC) is an application programming interface for gaining access to database systems. If you are interested, there is a much longer explanation of ODBC and its origin on Wikipedi. QuickBooks Desktop utilizes a proprietary database engine that requires a proprietary ODBC connection (unless you are using QuickBooks Enterprise). The ODBC application programming interface used in this article is QODBC, from Flexquarters . You can think of QODBC as the master key that unlocks access to your QuickBooks transactional and master data, using programs other than QuickBooks such as Excel, Access and SQL server.
As you can see, QuickBooks is in reality a database application. Because of this fact, we can access QuickBooks data using SQL statements to perform all kinds of useful tasks with our QuickBooks data. In fact, this is a good way to create a data warehouse of your QuickBooks data. Why would you want to do this? Read on…
Is QuickBooks Really Just Another Database Application?
The answer is yes! All your QuickBooks data is organized by tables, that are made of records that include fields within each record. Some of the tables are for master data, such as the chart of accounts and Customer Center, while others are transactional data tables, such as the table that records general journal entries, your account registers, and so on. Without getting to far into the weeds, the tables have relationships to one another their various fields. For example, a general journal entry that references an Item can retrieve the accounts that are to be debited and credited for that specific Item by referring to the master data table for Items. So a QuickBooks database is made up of master data table and transactional data tables, along with the linking fields that relate one table to another, is what is called a database schema.
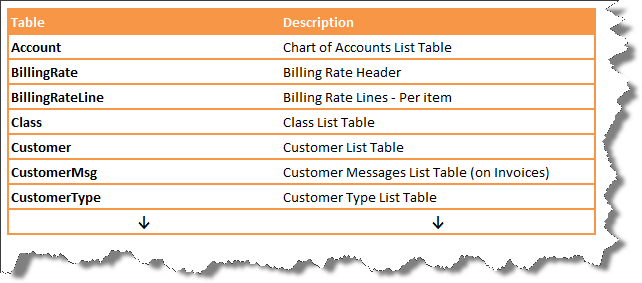
When I last checked, QuickBooks desktop was comprised of 42 master data tables and 70 transactional data tables. Here is a short list of a few of the actual tables:
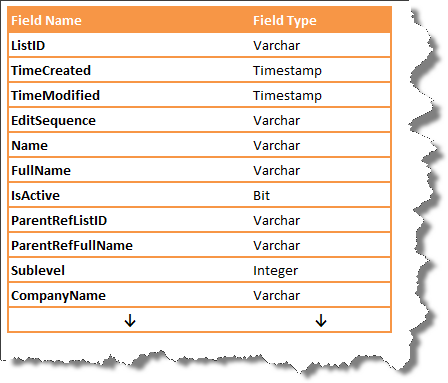
Then within each table is a collection of fields. Here is an abbreviated list of the fields residing in the QuickBooks Customer table along with the associated Field Types:
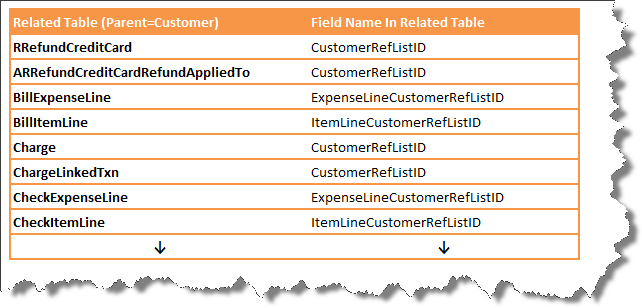
In addition to the Tables and Fields, there are the relationships that links the various tables together. The Customer ListID, which is the unique Customer ID number, is referenced in 47 different related tables. Here is an abbreviated list of the tables (left-hand column) that reference a customer using the Customer ListID field (right-hand column):
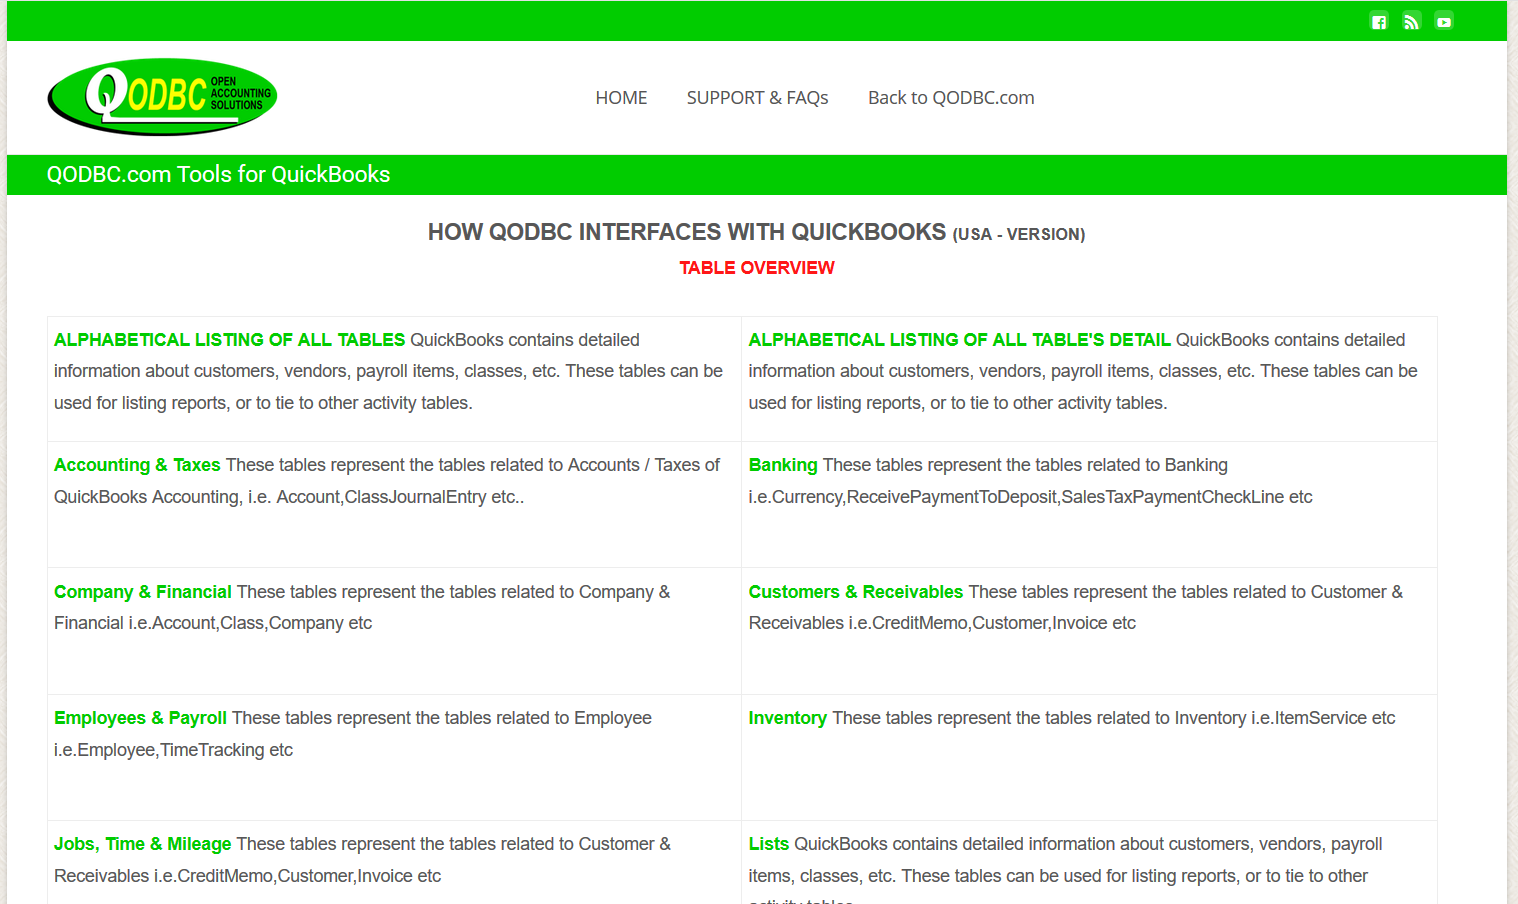
Though there are large number of tables, fields and relationships, you only need to focus on the tables that are relevant to your business requirement. The QODBC website has many pages showing the various tables and field relations on their Table Overview section of their website. Here’s the Table Overview page:
Once you have purchased QODBC, use the QODBC installation instructions to install/set up the DSN (Data Source Name) connection between your QuickBooks file and QODBC. With this in place, you can now use Excel, Access, and many other ODBC compliant programs to retrieve data from your QuickBooks file.
How to export QuickBooks data using QODBC
Now that you have installed QODBC and are connected to QuickBooks, you can now easily export QuickBooks data to Excel, Access, Word, MS SQL Server, Crystal Reports, etc. Though there are many programs we can use with QODBC to export QuickBooks data, our preference is to use Microsoft Access. The reason being is that there we can leverage the Access database capabilities to create a platform or data warehouse that can more readily used as a reporting engine for retrieving data. This is in contrast to exporting into Excel, which complicates matters and does not provide the same flexibility for other applications that need access to the data. Here is an example of how to import useful group of tables from QuickBooks into Access.
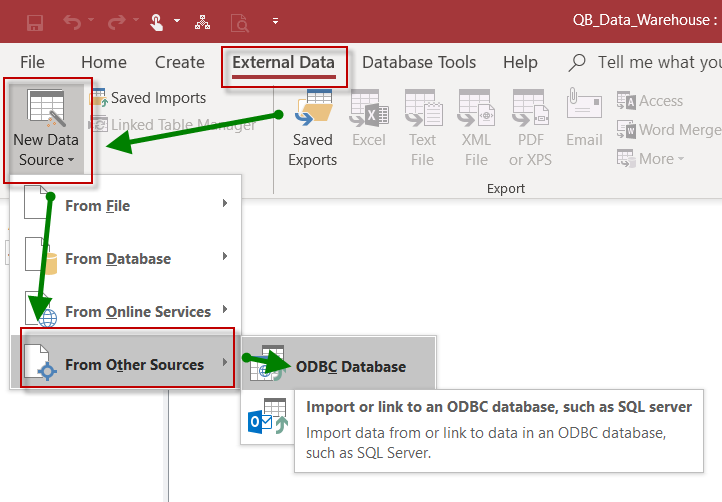
- Before you start, assuming you have already set up the QuickBooks ODBC connection discussed above, you just need to have the QuickBooks file you want to access open in QuickBooks; otherwise the ODBC connection has nothing to connect to without the file being open in QuickBooks. If you do not already have an Access file to use, then create a new Access file and navigate to the “External Data,” then “New Data Source,” select “From Other Sources” and finally click on “ODBC Database” as illustrated below:
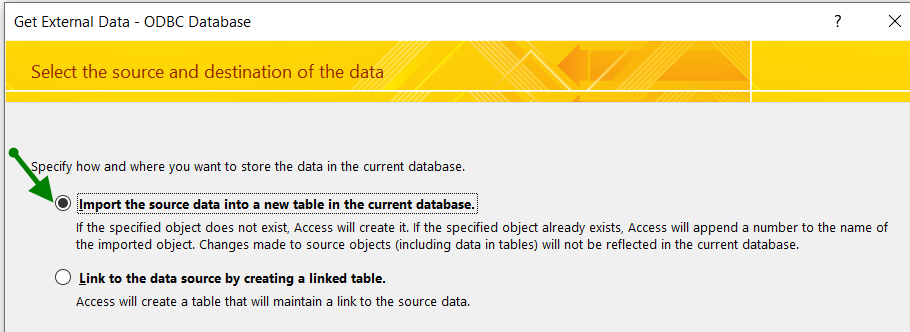
- The next step is to select whether you will be importing the data into Access or linking the tables. There are pros and cons to each approach. The biggest con with Linking is updating speed required with each query and report as Access reaches out to QuickBooks to pull the latest and greatest data. Importing the files is faster in that once you have imported the files, queries and reports run quickly. But you use this approach, you want to delete all the previously imported files and before you reimport whatever files you are accessing. In the example below, we are going with speed and consequently will import rather than link the files:
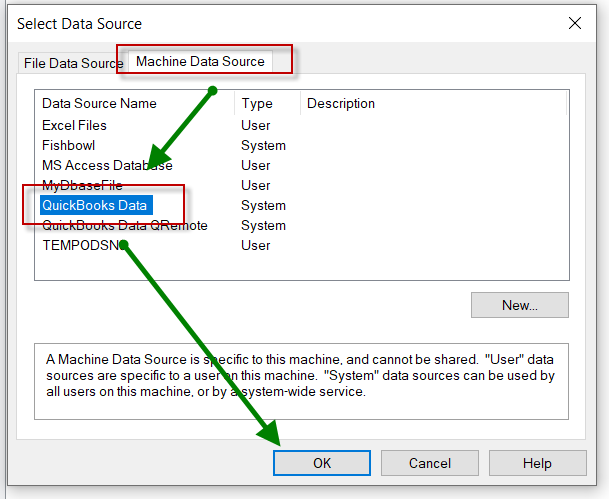
- Next you just need to select the Machine Data Source which will be “QuickBooks Data” as shown below:
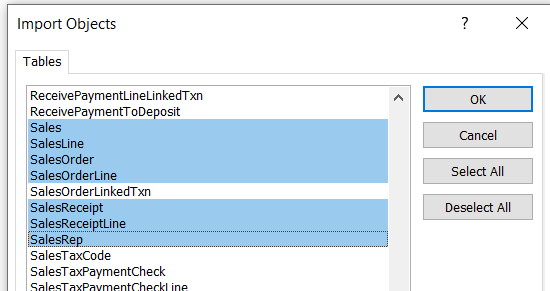
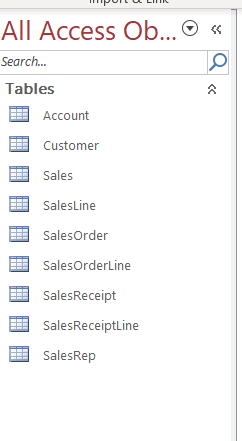
- The last selection is the tables you want transferred from QuickBooks into Access. We have a complete list of the current tables in a text file on our website if desired. In this example we are going to import the following tables: a) Sales – Sale Invoice header table; b) SalesLine – Sales Invoice detail line table; c) SalesOrder – Sales Order header table; d) SalesOrderlIne – Sales Order detail line item table; e) SalesReceipt – Sales Receipt header table, f) SalesReceiptLine – Sales Receipt detail line table; g) SaleRep – Sales Rep table, and h) Customers – the list of Customers. Just select OK to import these files.
- Once you have selected the file, QODBC will make the connection to QuickBooks and import the files into Access as shown below:
Now that we have imported our QuickBooks tables into Access, we have created a simple data warehouse that we can leverage using many other applications. The example above could be automated using Visual Basic within Access to delete the existing files, make the ODBC connection to QuickBooks and re import the latest files. If you only need to update the files on a monthly basis, the “brute force” method above works fine. If you need it updated daily, you are probably going to want to do it programmatically, setting up an Access program to run automatically everyday. If you need help with this, feel free to contact us.
A simple example using Word Mail Merge to leverage our QuickBooks data using QODBC
One of the tables we imported into our Access data warehouse was the customer master. The customer master is comprised of about 110 fields for each record. Additionally, the Customer table also contains the jobs for each customer; consequently we are going to want to filter down the information we send to Mail Merge using an Access query. The fields we need in our Word document are as follows: a) customer name, b) contact name (both first and last); c)Street Address (there are a number of ways that street addresses are referenced that need to be accommodated, but is beyond the scope of this blog post); d) City; e) State; f) Zip; and g) any Outstanding AR balance (the customer table has a field for the current AR balance as of the import without us having to create a link to the AR transactions, but there is no aging data in this field).
Rather than just exporting the entire Customer master table to the Word application, we are going limit both the fields and records that are exported using an Access query. We will create the query using Access’ Query Design View. Here are the steps to create a reusable Access query that will be referenced by Word Mail Merge:
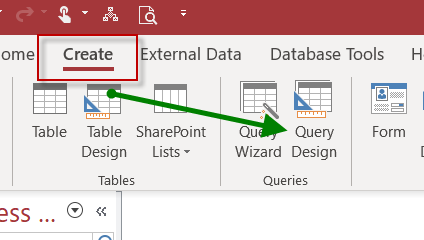
- To access the Query Design View, start with Create and then select Query Design View. This will bring up the Query Design screen where you can select fields, sorting orders, establish filter criteria, perform calculations, etc.:

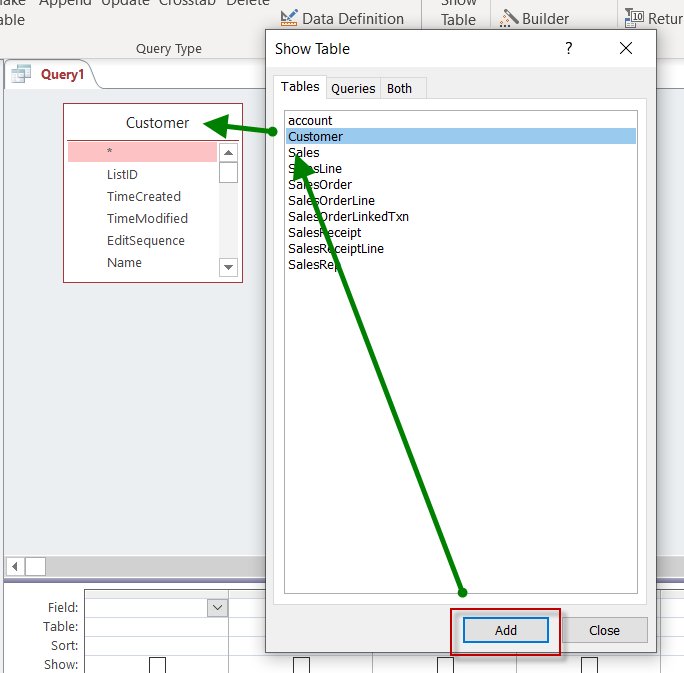
- Once you select to create a query, you will want to add the Customer table to the query from the Show Table dialog box shown below:

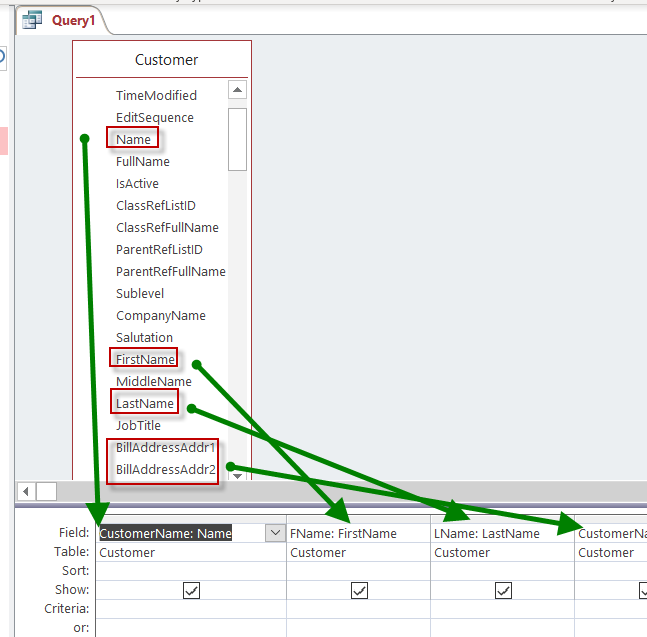
- Next we need to add the desired fields to our query. From the graphic below you can see some of the fields that we selected. If you look closely, you will see that I have renamed some of the fields. For example, QuickBooks just use the generic field name “Name” to reference the customer name in the Customer table. By appending a prefix, that is delimited with a colon, your query will return the field using the name you provide. So after adding the field to the query, you append the field with the preface “CustomerName:”, the query will use the new “CustomerName” as the field name. Just drag and drop the remaining desired fields on the “Fields” row of the Design View window shown below:

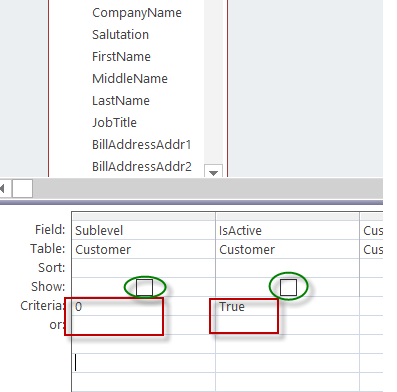
- Once you selected the fields that you are going to want to return, run the Select query to check your results. A couple of things to note in our results, we were retrieving both in active (IsActive = False) customers and the jobs that pertain to each customer. To eliminate both requires adding Filter criteria to our query. To eliminate the in active customers, simple add the IsActive field to the criteria and add “True” to the criteria. Eliminating the jobs is a function of selecting the correct Sublevel for the customers. A customer with a Sublevel = 0 will retrieve just the customer and no associated jobs. Note that we have deselected the check box in the Show row, which will just eliminate this field from our query results, which is what we want. Below you can see the details for our Filter criteria:

-
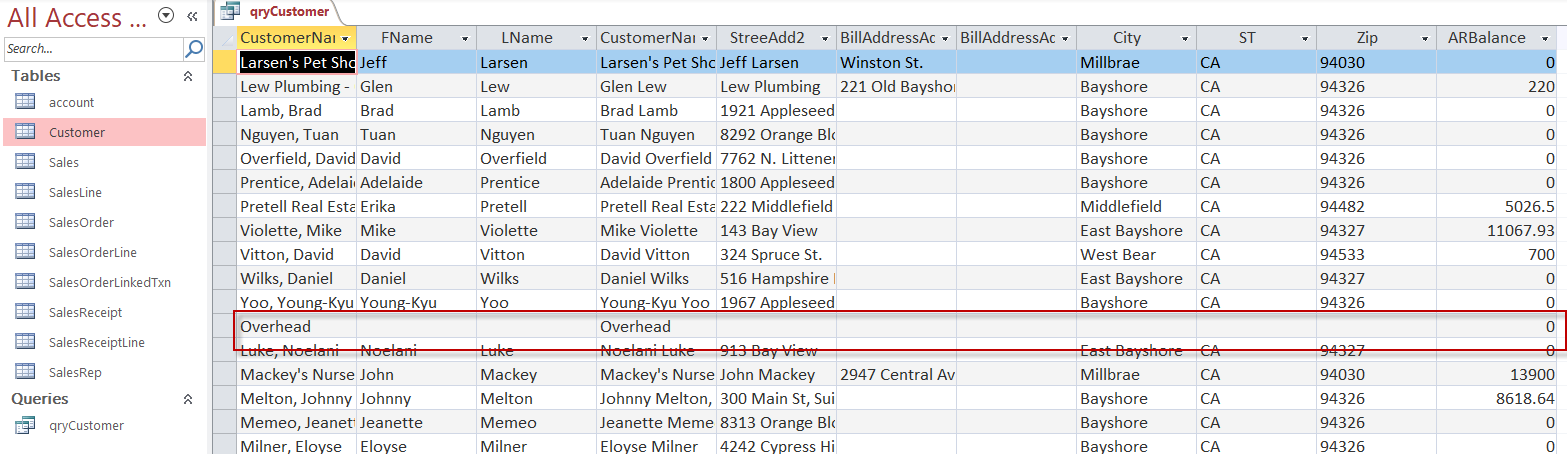
- Test the query results again to make sure you are returning only the necessary records. We can see below that given our criteria, we are returning a factor name Overhead, which we do not want in our customer list. So we need to add one more criteria, which is City is not null. Save your query using a descriptive name, which in the case below is “qryCustomer”.

- Test the query results again to make sure you are returning only the necessary records. We can see below that given our criteria, we are returning a factor name Overhead, which we do not want in our customer list. So we need to add one more criteria, which is City is not null. Save your query using a descriptive name, which in the case below is “qryCustomer”.
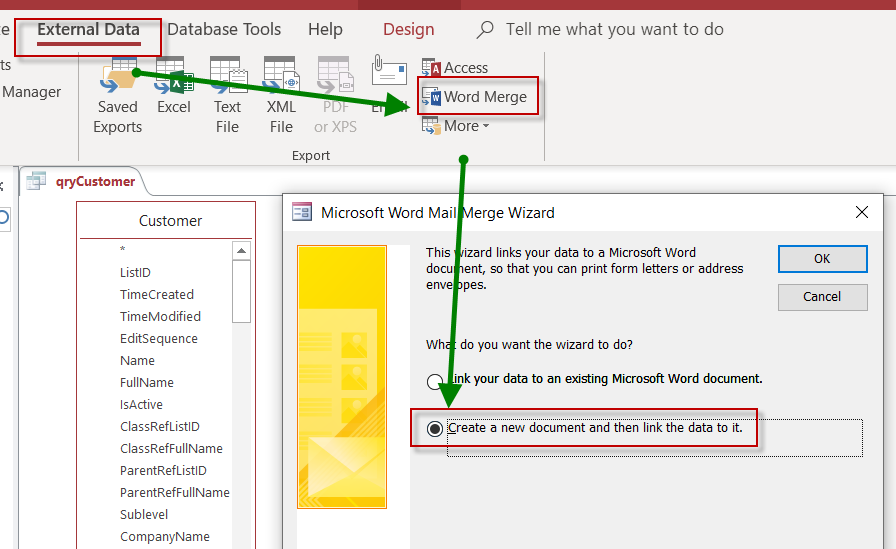
- From Access, you will want to export the query results to your Word Mail Merge document. With the qryCustomer query open, navigate to External Data, Word Merge and select “Create a new document and then link the data to it”. Using this option will open Word and link the new Word Mail Merge document to the qryCustomer data source.

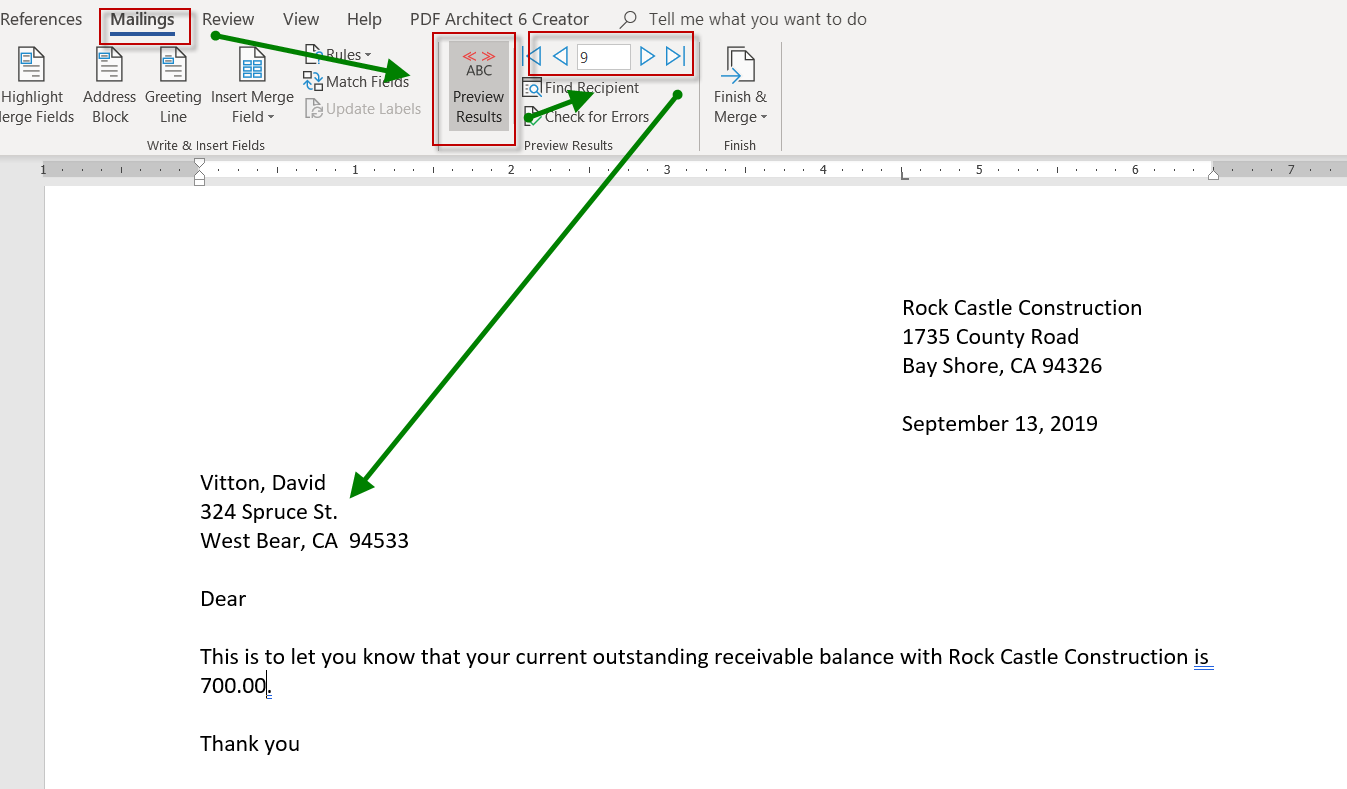
- Now we have transitioned to Word. Our new Word document has been linked to the qryCustomer result we created in Access. Now all we need to do is tell Word where to place our mergeed fields in our Word document. You can see that you can reference your merged fields using Mailings -> Insert Merge field as shown below:

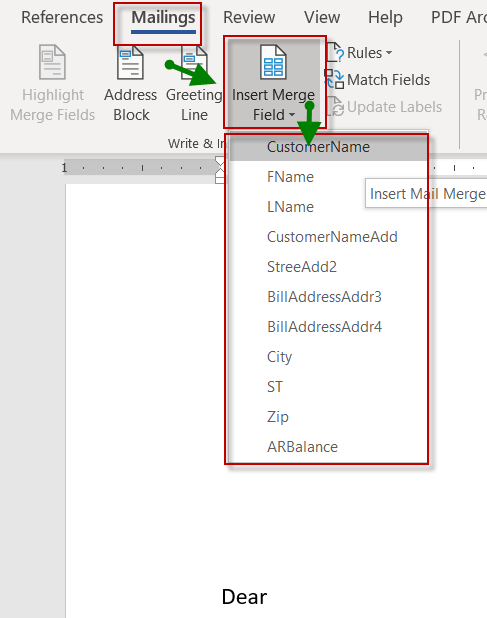
- You can see from our example below that we have mapped the CustomerName, StrtAddr1, City, State, Zip and outstanding total accounts receivable balance to a very simple Word document. Using the “Finish & Merge” function below you can merge/print just one or all your documents. It is fairly simple process to revise this Word document to print out addressed letters, or whatever you need to do with your customers. All you need to do is refresh your query in Word and you will get the latest and greatest customer list automatically, referencing your customer master in QuickBooks.

Well we hope you found this post helpful in your search for leveraging your QuickBooks data. This is a fairly simple example, but the approach can expanded dramatically as you can improve your Access skills. If you need help, feel free to contact us for assistance.

Other relevant posts: